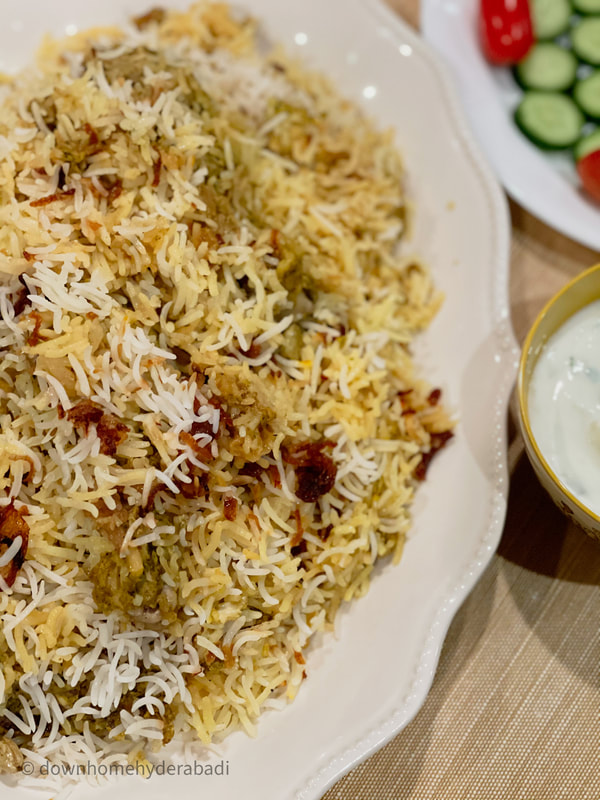
 This recipe has been a long time coming, but I have finally put together my recipe for Hyderabadi Dum Biryani with Chicken. I don’t know why I’m soooo nervous about getting this recipe out to you guys! I feel like all the expert aunties/moms are looking at me with a keen eye to make sure its done right! Hyderabadi Dum Biryani is the epitome of Hyderabadi Cuisine. A must for any event, big or small. You really haven’t hosted to the fullest extent and shown your affection until you have served your guests Biryani. Through the years I’ve found that the key to a good biryani is the freshness of the spices, especially cardamom. I always try my best to make sure to use freshly ground cardamom in order to get that fragrant smell. Of course, Biryani has to have its accompaniments such as Dahi ki Chutney(yogurt chutney) and either Bagaaray Baigan or Mirchi Ki Salan. We have consumed a lot of Biryani in order for me to get the perfect recipe out for you and we are not sad about that at all. I did want to let you know that I’ve decided to introduce you to the chicken version first because it is a easier protein to work with. The process of making biryani with kacchay gosht(raw meat) can be a little bit trickier than if you were making it with the meat pre-cooked and then layered. I’ve tried to make the process as streamlined as possible for you guys and I hope you guys definitely try this out! It’s not as overwhelming as it looks, promise. Step 1: Marination Ingredients 1 whole chicken cut(10 pieces) 1 cup plain yogurt 1 tbsp ginger-garlic paste 6-7 Thai green chilis, 1/2 bunch of cilantro, 1 cup mint leaves(optional) finely chopped in a food processor/chopper 1/2 tsp turmeric 1 tsp garam masala 3 tsp cardamom powder 1/4 cup lemon juice 2-3 tsp salt(adjust if needed) Wash and dry chicken. Add all the remaining ingredients above and marinade for atleast 2 hours. Step 2: Assembly and Baking Ingredients 2.5 cups basmati rice(I typically use Royal Chef Secret) 1 tsp carraway seeds(shah zeera) 3-4 cardamom pods 1-2 cinnamon sticks 1 tbsp salt 1/2 cup vegetable oil(preferably oil from frying the onions to make fried onions) 1 cup fried onions 3 tbsp ghee 1/2 cup milk Pinch of Saffron Method:
1. Pre-heat oven to 450 degrees. 2. Bring a pot of water to boil to cook the rice in. Season it liberally with salt as you would for pasta and add the caraway seeds, cardamom pods, and cinnamon sticks. Cook the rice just about 3/4 of the way through, or al-dente. It should still have a bite to it. If you are like me, you will have probably eaten about 15 grains of rice to check the bite! Drain the rice into a colander and keep aside. 3. In a separate pot(the biryani will be steamed in this one, so a thick-bottomed oven safe pot will be best), layer the marinated chicken on the bottom of the pot evenly. 4. To the chicken, add the vegetable oil, half of the fried onion, and 1 tbsp ghee. Mix everything together. 5. Next, you will layer the rice on top of the chicken. Spread it out evenly. 6. Sprinkle the remaining fried onions on top. 7. Using the back of a wooden spoon, poke about 4 shallow holes and place about 1/2 tbsp ghee in each hole. 8. In a cup, warm up the milk with a pinch of saffron for 1 minute in the microwave. Slowly pour over the rice. 9. Cover the pot with aluminum foil and then lid for a tight seal. 10. This step is the most important. Place the pot in the oven at 450 for 45 minutes. Pull the pot out and open one side of the foil and check to see if there is any liquid left by using a flat spoon and moving the rice just a bit from the edge of the pot. **If the liquid looks dried up and you see the oil/ghee separating from the chicken, then turn the oven to 300 let rest for another 5 minutes. ***If you still see some liquid, then keep at 450 for 10 more minutes and then rest at 300 for 5 minutes.(note: this step will be about the same if you were to double the recipe) Remove the pot from the oven. Use a flat spoon to carefully mix the chicken with the rice. This is best done right when it comes out of the oven. ***Serve with Dahi Ki Chutney and Bagaaray Baigan*** Recipe for a simple Dahi ki Chutney 1 cup yogurt, 1 small onion finely diced, 1 tsp ginger garlic paste, 1 finely chopped green chili, 1 tsp salt, and chopped cilantro Whisk all the ingredients together and serve with Biryani. Click on Fried Onions and Bagaaray Baigan for their recipes.
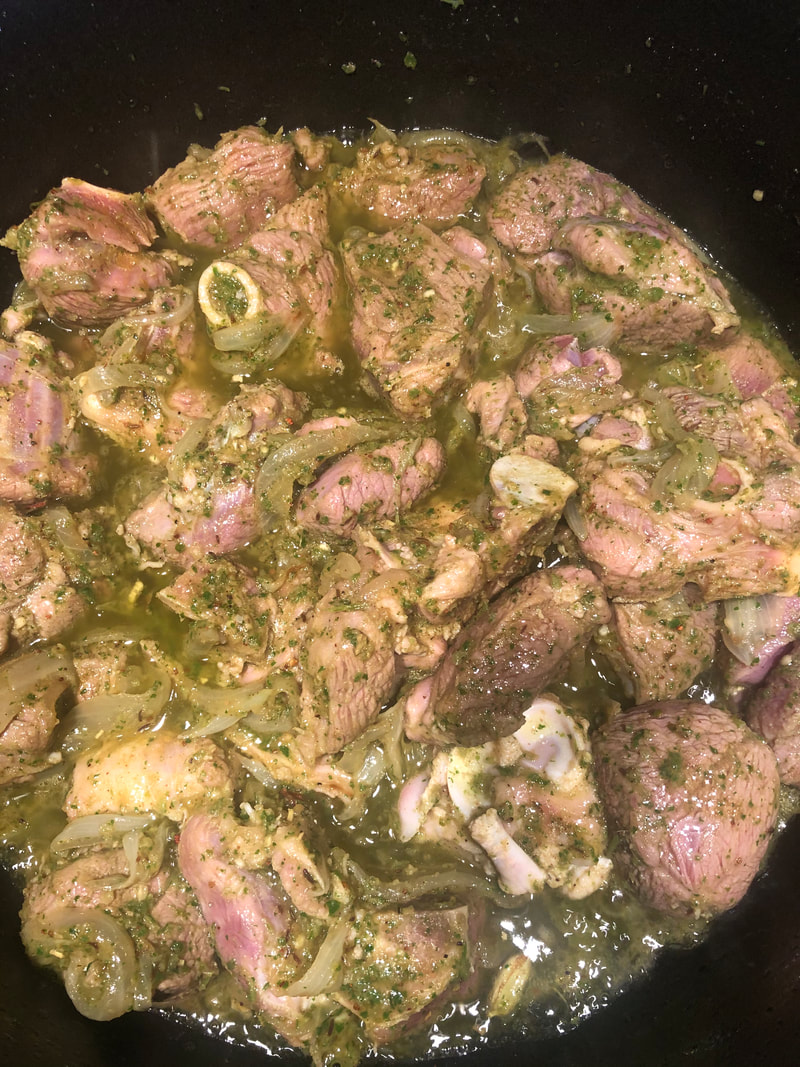
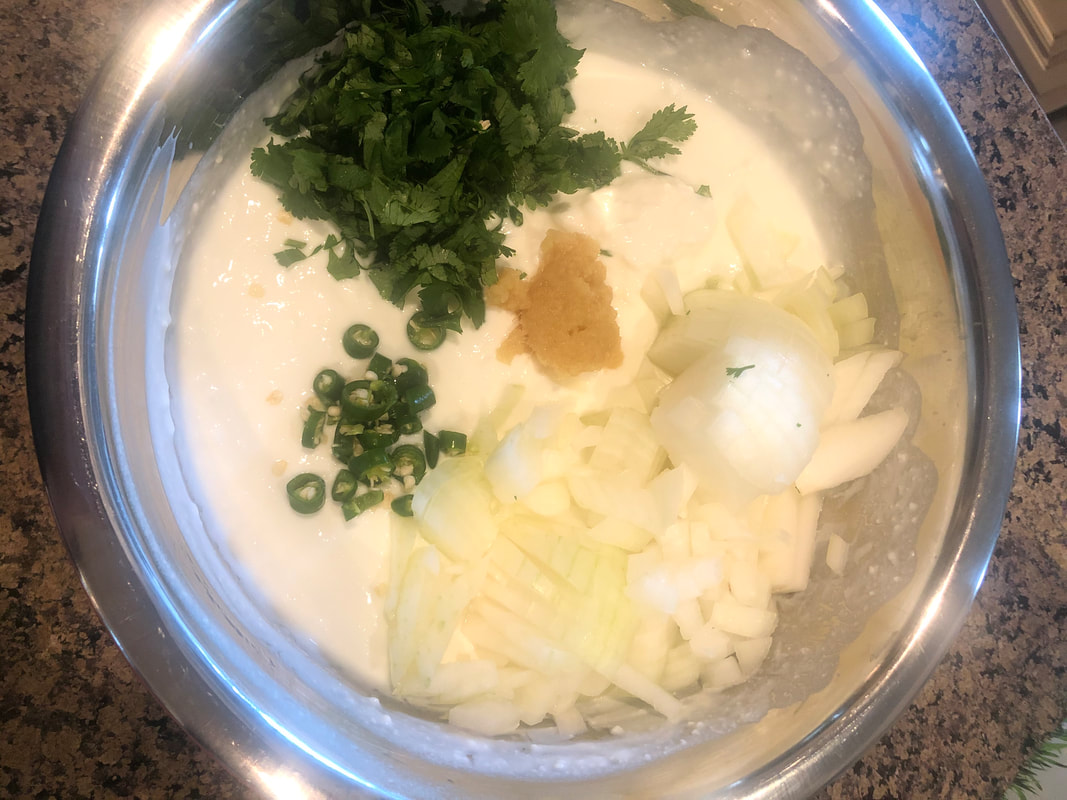
8 Comments
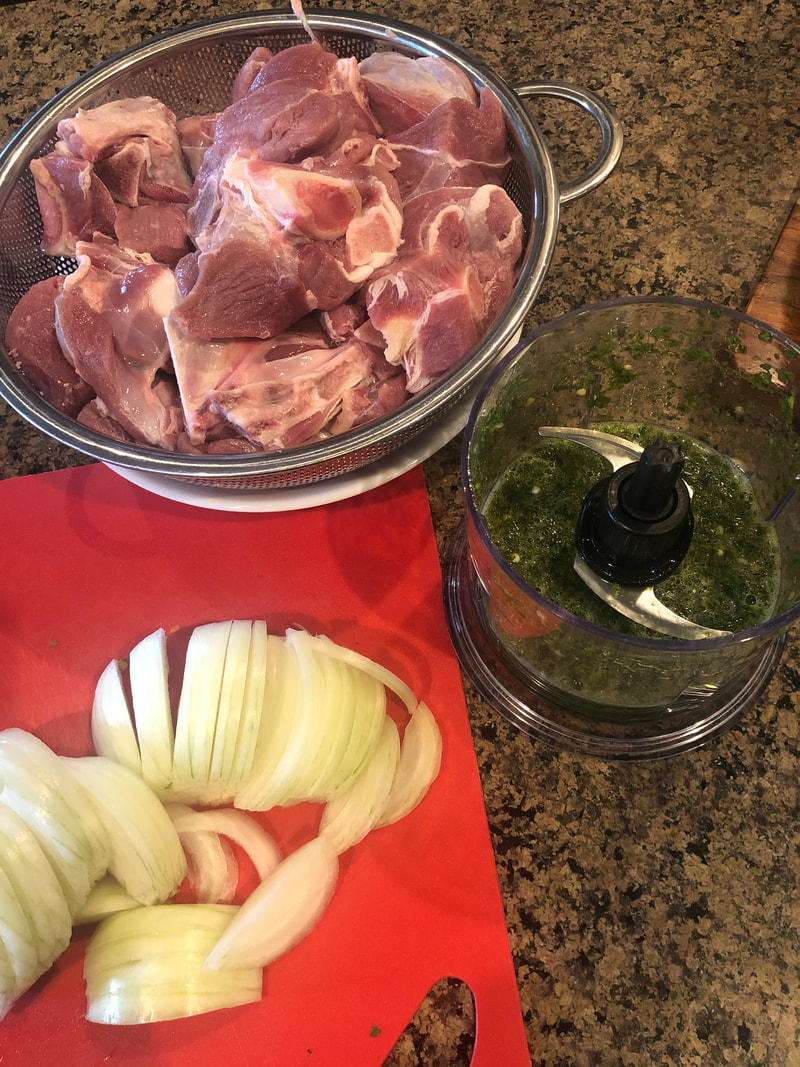
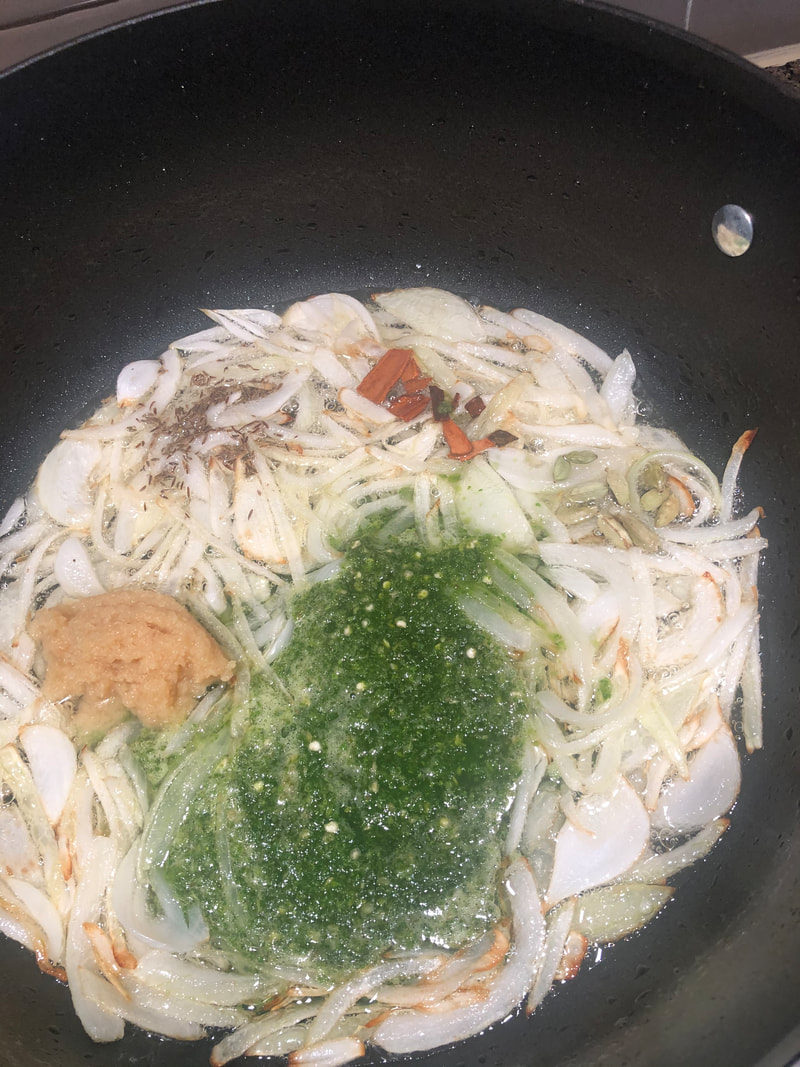
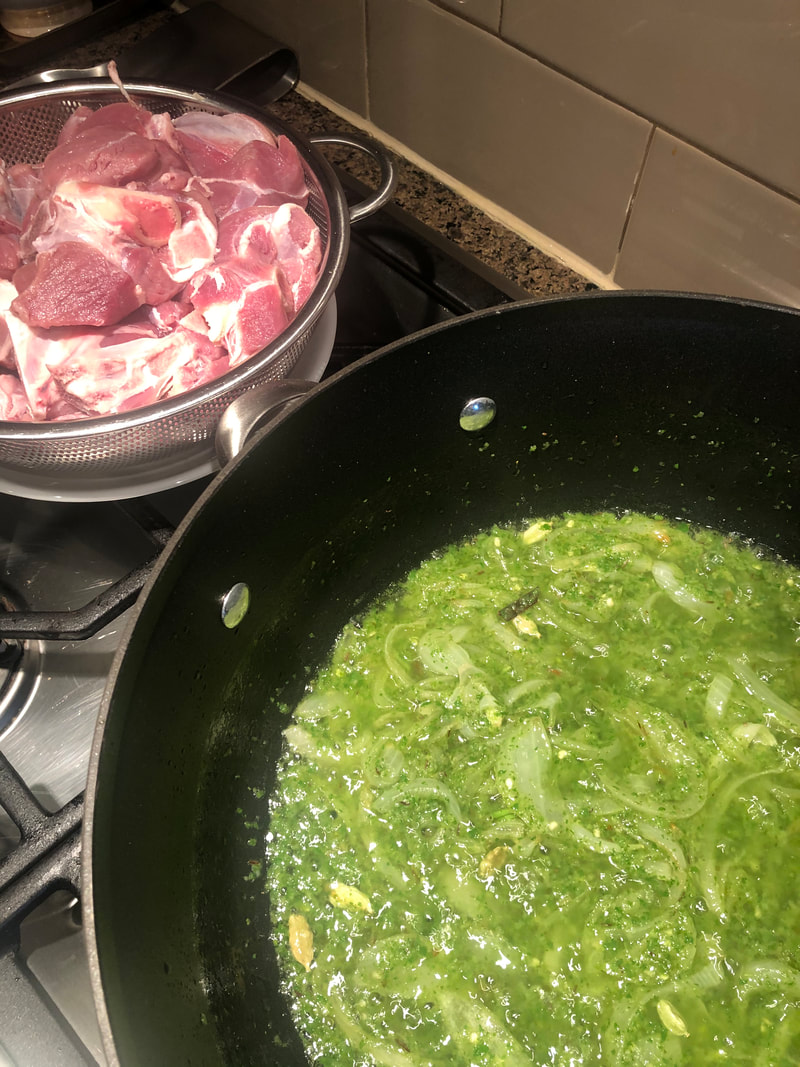
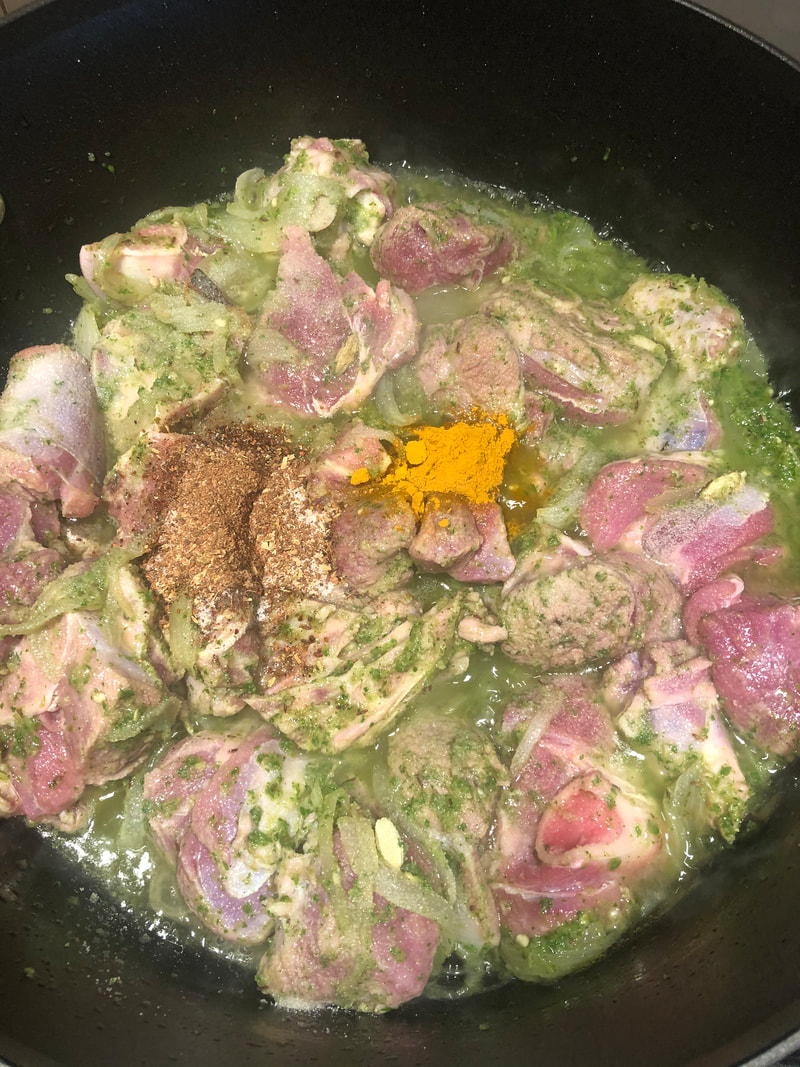
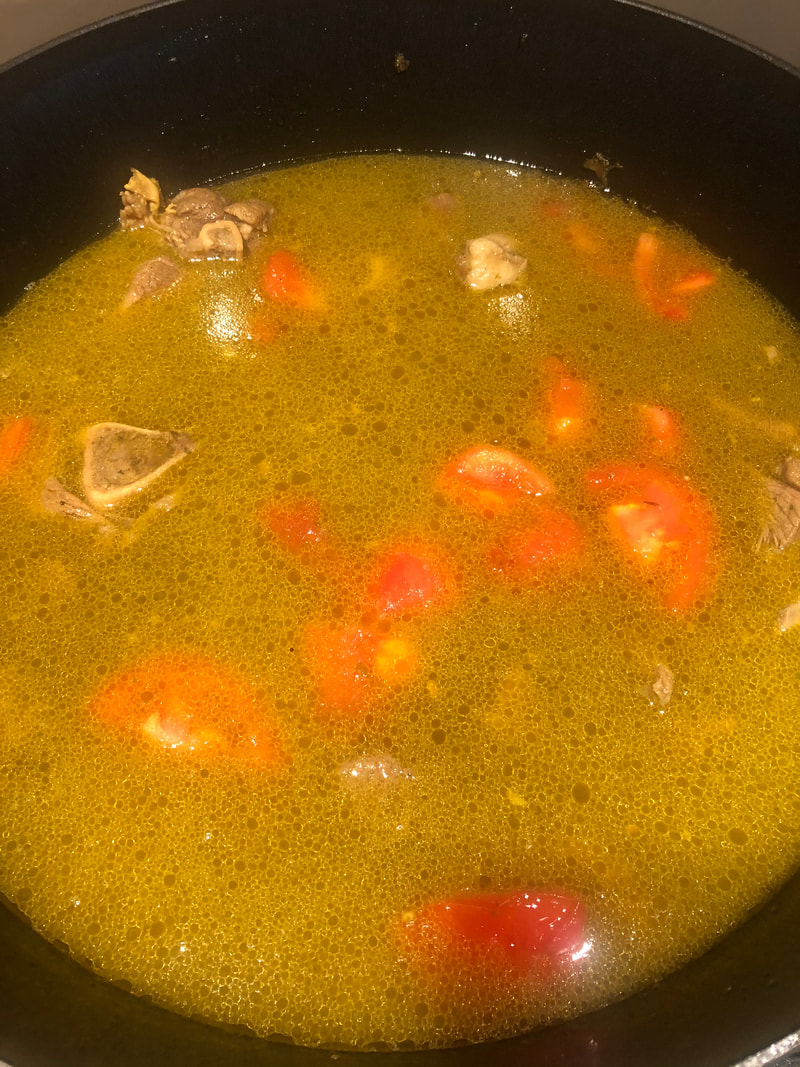
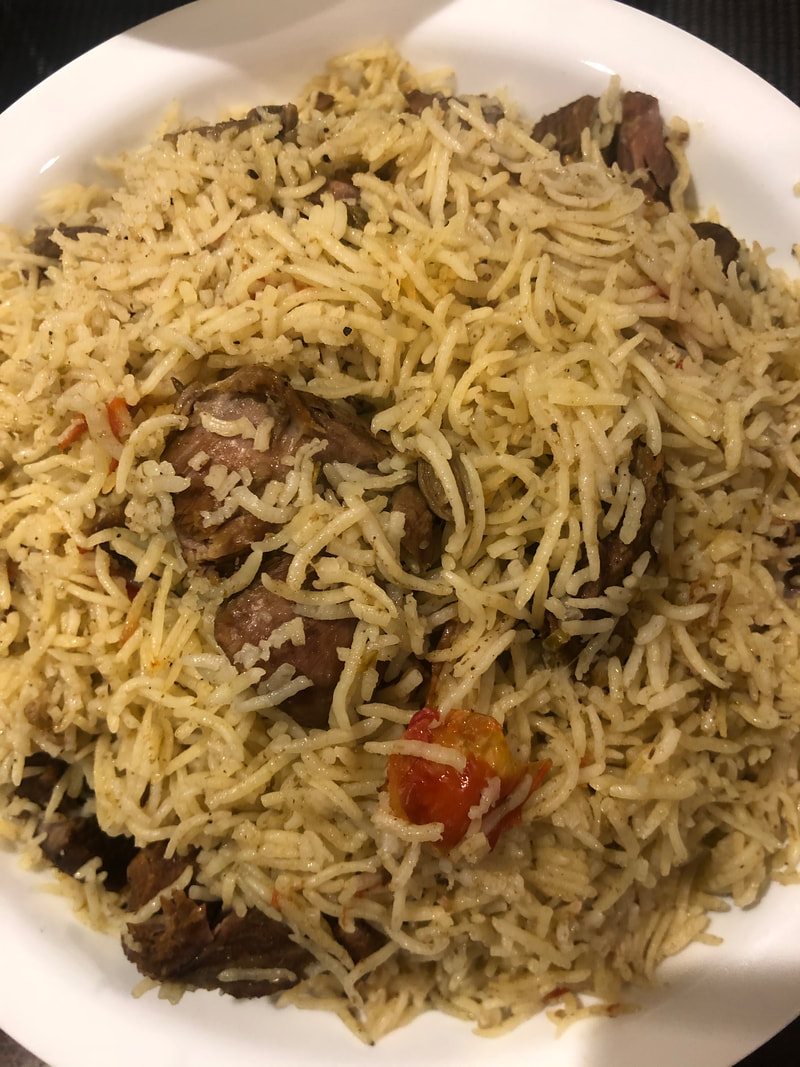
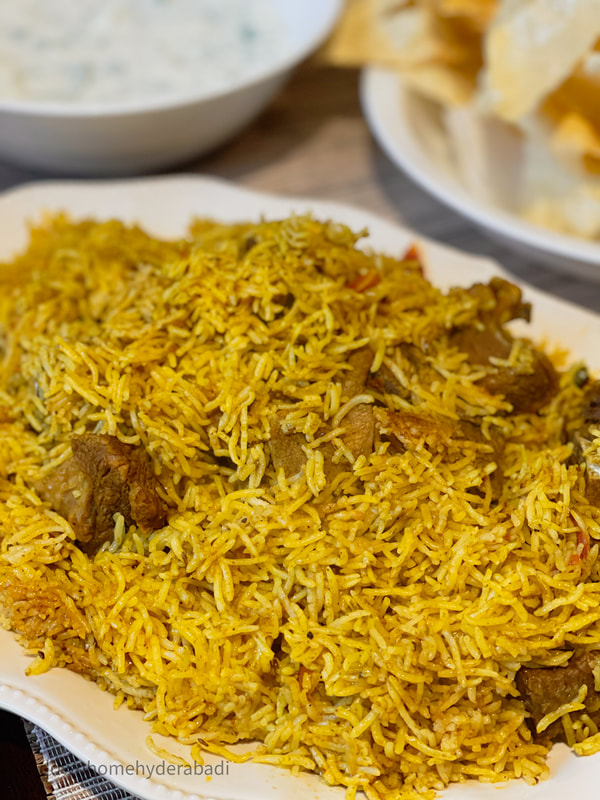 Mutton Tahari is a simple one dish meal consisting of mutton/lamb and rice. Tahari is often confused with its close counterpart, Biryani. Both are one dish meals, however, there are two key differences in the preparation of the two. Biryani, especially Hyderabadi Biryani, consists of layering uncooked meat with rice(half-cooked) and baking in a large pot together. While, Tahari(or Pulao) the meat is cooked beforehand and then the rice is cooked in the meat broth. Both can be made using chicken if you are not a big fan of lamb or goat. I have written up my go-to recipe which has become a family favorite. Hope you give it a try! UPDATE: SCROLL DOWN FOR IP VERSION! Measurement tips: I’ve written this recipe for 2 lbs of meat. But if you want to increase the quantity, my go-to ratio is 1lb meat:1.5 cups rice. So, for every pound of meat, take 1.5 cups of rice. Ingredients 2 lb mutton leg meat 3 cups basmati rice 4.5 cups water 1 large tomato chopped 1 medium onion diced 3-4 green chili 1 bunch of cilantro 1 tbsp ginger-garlic paste 1 tsp shahi zeera(caraway seeds) 1 cinnamon stick 4-5 cardamom pods 1 tbsp garam masala 1 tsp turmeric 1 tbsp salt Method 1. Pre-heat oven at 350 degrees. 2. First, we will cook the meat. Choose an oven safe pot that will be large enough to hold the meat and rice. 3. Heat oil and sauté the onion until golden brown. While the onion is cooking, finely chop the green chili and cilantro using a chopper or blender. 4. Add the green-chili & cilantro, ginger-garlic paste, shah zeera, cardamom, and cinnamon stick. Sauté everything together. 5. Add the meat, turmeric, garam masala and salt. Sauté until brown. 6. Add about 2 cups of water. Cover and cook on low for about 45 minutes-1 hour, until tender(should be tender, but not coming off the bones. It will continue cooking further in the oven) 7. Once the meat is tender and the oil has separated from the meat, add chopped tomatoes and cook until softened. 8. Add 4.5 cups water and bring to a boil. Once the water starts boiling, add the rice and cook until it rises just above the water. 9. Cover and bake in oven for about 30-40 minutes, until the rice is cooked. 10. Serve with a simple Dahi ki chutney(yogurt chutney) Dahi ki Chutney 1 cup yogurt 1 small onion finely diced 1 tsp ginger-garlic paste 1 tsp salt 1 chopped green chili chopped cilantro Whisk all the ingredients together and serve along with the rice. IP VERSION 1. Heat the IP on saute mode. Saute the onion until brown. 2. Add green chili and cilantro paste, tomato, ginger-garlic paste, shahi zeera, cardamom pods, and cinnamon sticks. Saute. 3. Add the meat, salt, red chili powder, turmeric, and garam masala. Saute until meat is browned. 4. Add 1 cup of water, cover, and cook on meat mode for 10-12 minutes. 5. Steam release, turn the saute mode on. Bring the broth to a boil and add 3 cups rice. The existing broth in the IP should be enough to cover the rice. If you feel it is too tight, add 1/2 cup water. The rice should be covered completely with liquid. 6. Cover and cook on rice mode for 12 minutes. Steam release and serve. 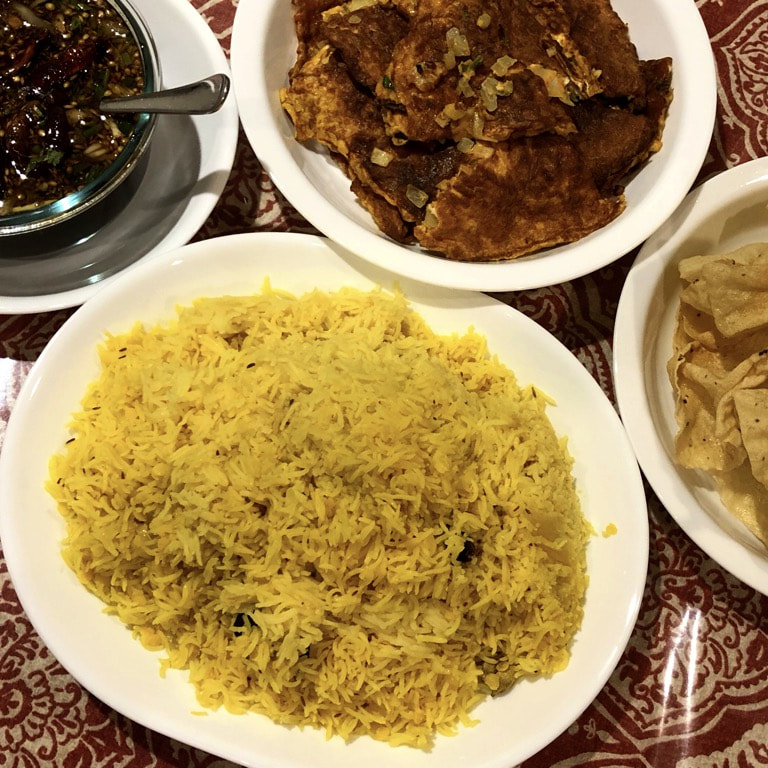 Kichdi, Khatta, Anda, Papad...When all put together, you have the most popular breakfast meal in Hyderabad. Growing up, it was tradition for my mom to make Kichdi for Sunday Brunch every week. Kichdi is a very healthy dish that simply consists of ‘rice and lentils’. Yet, it is only one component of the entire meal. It is traditionally served with a chutney called Khatta, that is made of tamarind. Along with it, we either make an omelette called ‘pyaaz ka anda’, kheema(ground beef), or a fine delicacy of Hyderabad, ‘talay huway gurday kaleji’(fried kidney and liver). It is then paired with mango pickle, some ghee, and pappadums for some crunch. Now you have a meal! Obviously, this is not a light meal when put together, so it has become more of a staple meal for Sunday dinners in my home and is a popular favorite among the family. Do check out the side dishes for Kichdi below: Pyaaz Ka Anda Khatta Ingredients: 1 1/2 Cups Rice 1/2 Cups Red Lentils(Masoor Ki Daal) 1 Medium Onion Sliced 1 Tbsp Ginger-Garlic Paste 1 Tsp Turmeric 1 Tsp Shah Zeera 4 Pods Cardamom 1 Cinnamon Stick 3 Cups Water 2 Tsp Salt Method
1. Take the rice and lentils and wash them thoroughly. Cover with water and let soak. 2. In a medium pot, heat 1 tbsp oil and fry the onion until slightly browned. 3. Turn the heat to low, add the ginger-garlic paste, turmeric, shah zeera, cardamom, and cinnamon stick. Sauté all the ingredients together well. 4. Drain the water from from the rice and lentils mixture and add to the onions. 5. Lightly sauté and mix everything together. Add the 3 cups of water and salt. On medium heat, bring the water to boil. Cook until the rice is about 3/4 cooked then cover the pot and let cook on a low flame for about 15 minutes until the rice and lentils on completely cooked. |